Showing posts with label tutorial. Show all posts

Saturday, July 2, 2011

Modified Olivia- tutorial

IMG_8152 edit


IMG_8143 mod
IMG_8165 mod
arnt they georgeous!
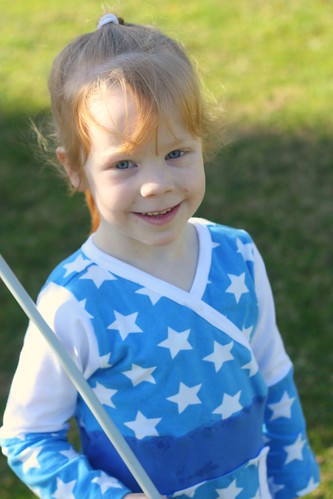
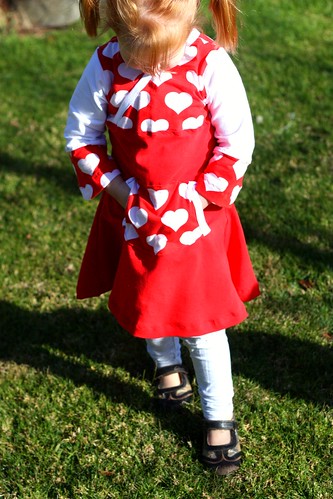
This is a modified version of the Olivia pattern by Farbenmix.  If you have girls this is a must have pattern.  So easy and quick.  Typical me- instant satisfaction dress.

I was looking for a way to use only 50cm of my favourite knit fabric, yet still make a dress.  So here is my effort. I was inspired by this one that I saw on Flickr.  Sorry if you cant see it, but I cant find the blog address for this talented seamstress.
This fabric is JNY knits and also stella from Crafty Mamas

Started with the bodice of the Olivia dress. I just traced the front and then copped it off straight about 4cm under the arm.


Traced it out onto some more tracing paper to make the whole bodice.
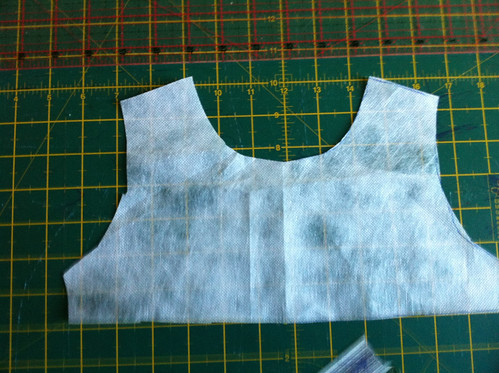

Ruled a line from one shoulder to the bottom. I lined it up with the outer shoulder seam. I also filled in the part of the neck that was left with no paper.
The 2 lines are an error. There should only be one line.
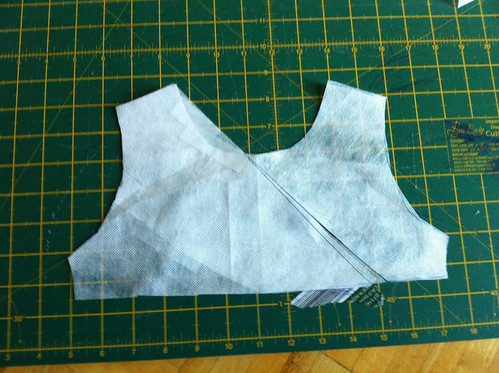


Cut along the line

cut 2 in the opposite. If you are using directional fabric make sure that you notice the direction (yes saying this from experience). Also add a seam allowance on the bodice and skirt so that you can sew them together. I didnt add any seam allowance to the neck as it would have made the neck too small.


Cut out the back as per normal (just the bodice part), sew the shoulders together, and then add your neck binding. I did the traditional neck binding, but you can do it just right sides together, it just means that you would add a seam allowance and top stitch. I did sretch the binding slightly, but not as much as I would on a normal neck.
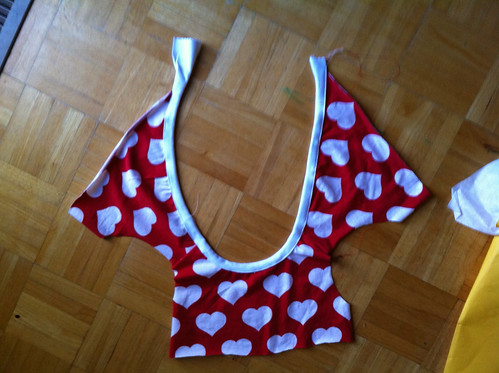

pin is all together and sew along your stitch line where you top stitched the binding. Make sure that the join at the intersection is sewn well, as there will be a lot of pressure on that seam.
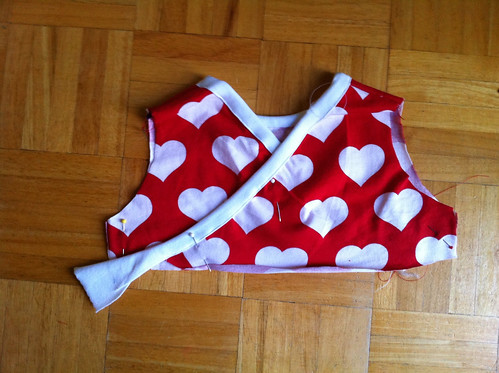


then sew your pocket onto the skirt
attach your front skirt and back skirt, and top stitch.
add your sleeves. I did 2 tone sleeves.
The new from your hem right around to the end of the sleeve. Make sure that your seams match at the bodice and under the arm. You may want to use wonder tape of loads of pins.
Hem as per normal.

Hope you enjoy, and dont forget to show us all when you give this a go.


Tuesday, April 13, 2010

Percentage widget thingy

I had someone contact me asking me about the widget down the side.  Unfortunatly my computer died a few weeks ago and so did the emails that were sent.

So I thought I would pop it up here for everyone to use and see.

I am being a little cheeky as I cant remember where I sourced this from.  I think I may have copied it out of a post on a forum.

To add this go to your layout page, add a widget, then add html.

where it says 0,200 you change the 0 to what percentage that you want.  You can also change the colours if you know html codes.

code:


Fooey! I cant figure out how to post HTML codes on my blog- your going to have to contact me again and Ill email you the code.  If you leave a comment make sure that I can reply to your email.


Tuesday, February 2, 2010

Sewing with Knit- some thoughts from Sara...

Sara is from Willow & Moo, and has been sewing with knit for years, and has kindly shared some thoughts about sewing with knit to help us all.

Thank you Sara!

Something in knit is February's challenge. Carolyn has asked me to write a bit about sewing with knits. I am by no means an expert, but I sew a lot of knits, mostly cotton and cotton/spandex. I was afraid of them before I started. I'd heard all the horror stories, but I wasn't going to let that stop me. I did my usual thing of doing a bit of research before embarking upon a project. It's my scientific training. Following are links and bits of information that I've found useful.

Knits always seem a bit scary for the uninitiated, but they are quite forgiving.
Here are two great links with lots of excellent information about knits.
Timmel Fabrics Sewing with Knits Lessons
Denver Fabrics - sewing with knits

With knits choosing the right needle is important. I use either a ballpoint needle or a stretch needle. A sharp needle can pierce the fibres on a knit and make holes. A ballpoint needle will push through the fibres without damaging them. I sew a lot a knits with spandex, and I use a stretch needle on those.


Use polyester thread. I will admit that I do use cotton thread at times, but that is because I am a dyer and need my thread to dye with the garment. Polyester thread has more give in it, so it's less likely to break if stretched. Wooly nylon can also be good to use in the lower looper of your overlocker.


If you have an overlocker, use it. It's quick easy and gives you a seam that can handle the stretching of the fabric. If you don't have an overlocker, you can still sew knits. I use my sewing machine for some things when sewing knits like topstitching or when I need the sort of control that I can't get with the overlocker. If I use my sewing machine, I use my walking foot. A walking foot isn't just for quilting. It walks the fabric through the machine. This keeps it from getting stretched out. If for some reason I want to use a different foot on my machine then I lower the presser foot pressure. Not all machines can do this though.

If you are sewing a seam with a sewing machine, you can use your machine's stretch stitch. You can also use a wobble stitch - a regular stitch length (2.5-3.5 whatever you like) and a 0.5 zigzag. I also reduce my tension a little. Reducing the tension provides a bit more give in the stitches.


After reading the draft of this Carolyn said to me, but how do you deal with curling edges? And my reply is that I just deal with them. It's jersey knits that have a tendency to curl on the edges and this can make it difficult to line up the edges of the fabric. To be honest it drove me mad when I first started sewing knits, but now I don't even think about it. If I am trying to match stripes, I either use some pins (and more pins) or Wash-a-way Wonder Tape. Some other things that you can try to tame curling edges are starching and pressing the edges or you can use a gluestick. I've read about people using washable glue stick to stick the edges together. You need to let the glue dry before sewing!


After you sew a seam or hem, steam is your friend. Even if the seam appears a bit wavy a quick press with steam will usually bring it back into shape.

Now if you haven't done a neckline, it can seem scary. There are two main ways in which you can finish the neck. One is with a rib style band, and the other is to bind the neck. Lesson 2 on the Timmel Fabrics site shows you how to do both types. I found this link invaluable. Here is another great tutorial for a bound neckline. The one thing to always remember that the length of fabric that you use for the ribbing or binding will depend on the stretch of the fabric. With experience it becomes easier to know how much to use.

There are several options for hemming knits.
1.Coverstitch machine – this produces a hem like you find on a store bought shirt. It's two rows of stitches with a sort of zig zag on the back which covers the edge of the hem.
2.A twin needle – a twin needle can be used to give the same effect as a coverstitch on a sewing machine. You need a stretch twin needle and a common width for hems is 5mm, but if you like a narrower gap between the stitching, look for a 3mm.
3.A stretchy decorative stitch on your sewing machine. I do this a lot. For girls' items I use something that looks like a curvy or wavy stitch.


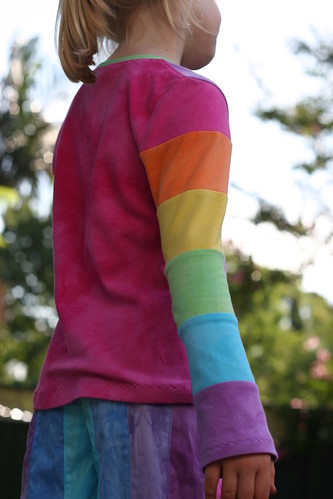
Rainbow sleeve

For boys' items I sometimes use a honeycomb stitch.


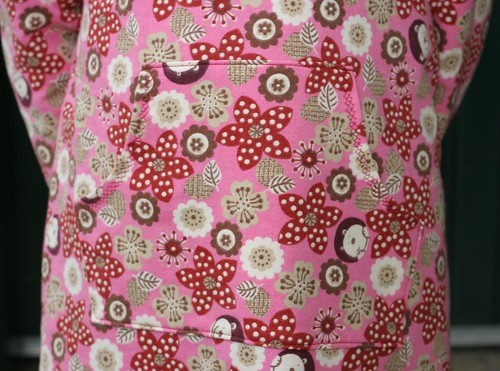
Knut Hilda pocket close up.

The honeycomb stitch is on the pocket openings.
4. Lettuce hem


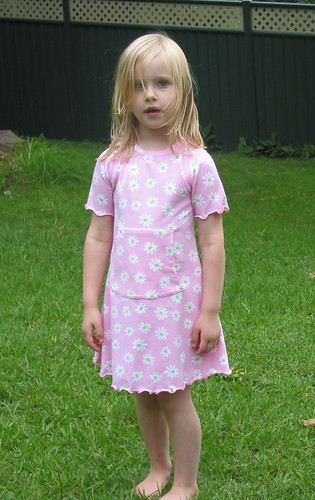
Olivia in pink knit with white flowers

I do my lettuce hems by setting up my overlocker for a 3-thread rolled hem. Then I stretch the fabric as I sew it. This creates the lettuce effect. Not all knits lettuce well. The very first time I tried it. I thought that I was doing it wrong. Turned out the knit I was using just didn't lettuce. So before you get your heart set on using a lettuce hem, test it out on a scrap of fabric.

I use Steam-a-seam 2 on my knit hems. It's stabilises and holds my hem without pins, so it's easy and quick to stitch. Even though Steam a Seam is a fusible, it still has some stretch and give to it. There is also another method of hemming knits using Solvy (If you haven't visited Pam's blog before, have a look around. She's an inspirational seamstress).

Do you have a pattern already? Or do you need a suggestion? Kwik Sew makes lots of knit patterns as do Jalie. If you are looking for great fashionable tops, Ottobre Design always has fabulous t-shirt patterns in their magazines. They also have a stand alone basic t-shirt pattern, Ottobre 301 for kids and 303 for women. The first knit pattern that I ever made was the underdress of the Farbenmix Olivia pattern. It is still one of my favourite patterns as it is quick and simple to put together and the end result is fantastic.

addit: there is some project ideas in amoungst the commnets ;)

Sunday, May 10, 2009

how to sew the crotch on pants

I have used white overlocking so that you can see it, if you use the overlocker please be sure to also stitch it as well, as the overlocking is not strong enough on such a high wear seam.


So you have 2 legs of the pants, already sewn at the side and middle seams.


Turn one leg the right way out

Slide the leg that's the right way out into the leg that is the wrong way out. So that the legs face right sides to right sides the front leg should be at the front and the back at the back, middle seam against the middle seam, side seam against side seam.

Pin it so that the seams match. the crotch seam matching the crotch seam etc...
I then sew from the crotch to the waist.


Say hello to the sock monkey that Tyler insisted on being in the pics!

Go back and sew the other side of the crotch.

So it comes out looking like this (hello monkey!)


Turn the legs the wrong way out and inspect your handy work.


Now turn it the right way out, and again inspect :D

Now go ahead and finish the waist band and around the ankles,

Hope this has helped, please lmk if there is anything that I need to change or improve. This is my first 'tutorial' so I am learning.

I have edited this to add that I have used the overlocker, I would suggest that if you do the same to use the sewing machine as well as it is a high stress seam.